10 Winter Nail Design Ideas To Light Up Your Mood
It is time to talk about the fanciest winter nail design ideas. You might think, “Why should I think about a fresh manicure when my dry hands will be under gloves all season?” But let me tell you something; it is all about feeling beautiful and personal satisfaction.
In the winter season, a cute long coat and perfect seasonal nails can make you more pretty. When you remove your gloves at a winter party, everyone will say, “woah.” But it is not just about impressing others: it is about taking care of yourself too. It is like self-love and boosting your confidence, even in the midst of a frigid winter.
Also, trying vibrant or daring colors and creative nail ideas can lighten your mood and remind you that brighter days are ahead. So, whether you are rocking a classic shade or trying out some funky nail art, don’t let the cold weather put a damper on your style game.
Table of Contents
- Get Inspired By These Winter Nail Design Ideas From Instagram
- DIY Winter Nail Design Ideas
- Importance Of Proper Nail Care During The Winter Months
- Winter Nail Care Tips
- Rock This Winter With Healthy And Pretty Nails
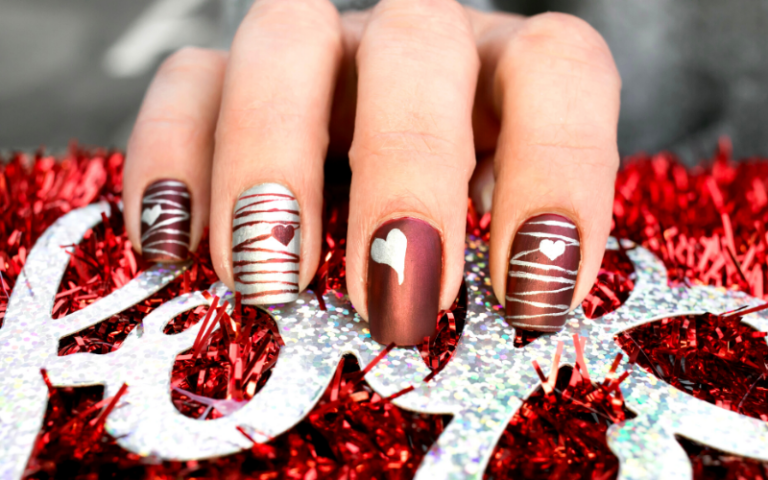
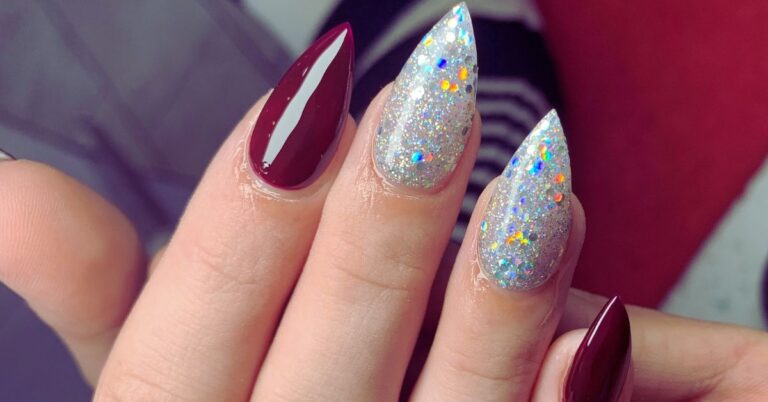
Get Inspired By These Winter Nail Design Ideas From Instagram
Check out this gorgeous nail design of Chloe Grace Moretz as she rocked the London premiere of The Peripheral. Take a cue from her style and create your own stunning winter nail ideas.
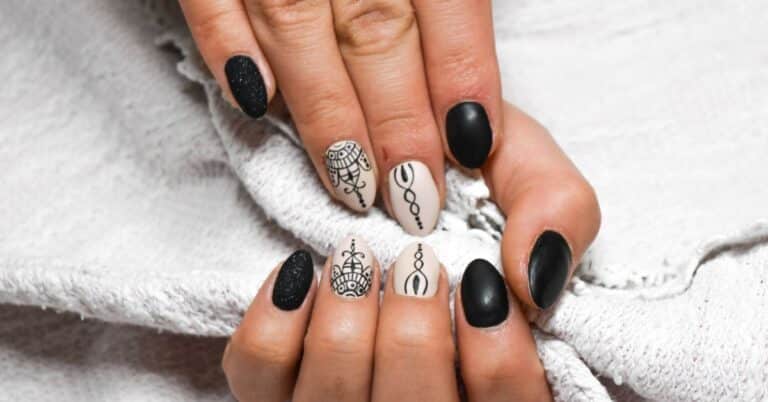
Check Teyana Taylor‘s striking nail design, inspired by an Egyptian goddess. Take notes from her style and elevate your winter look with this nail idea.

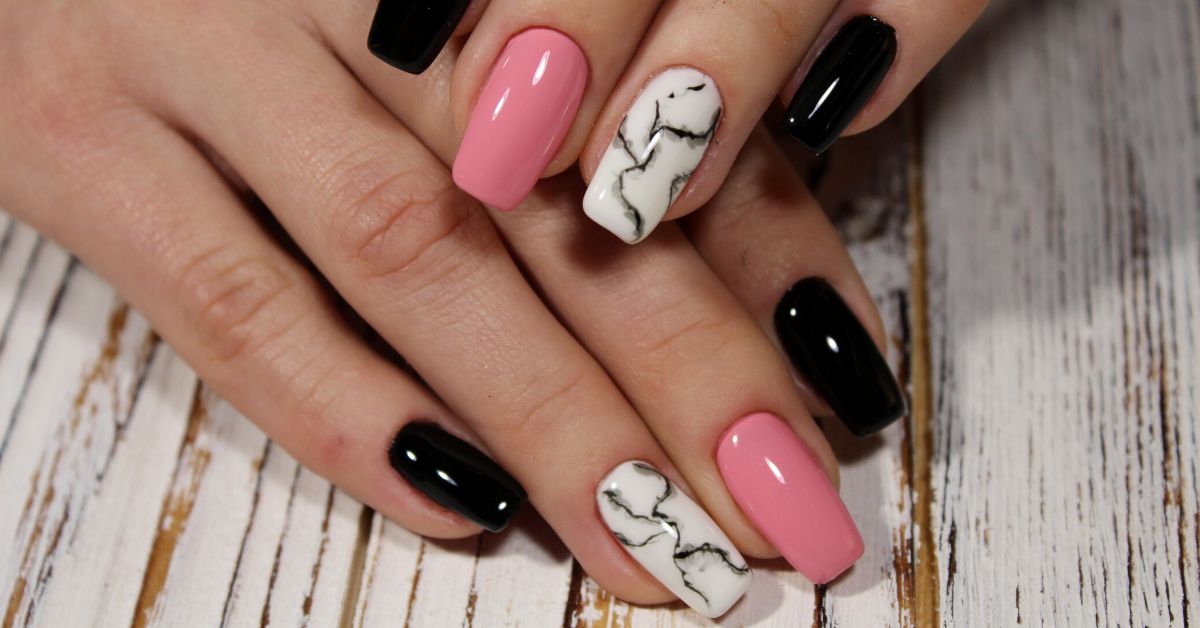
DIY Winter Nail Design Ideas
There are many popular winter nail designs that you can try out. Here are some easy winter nail designs:
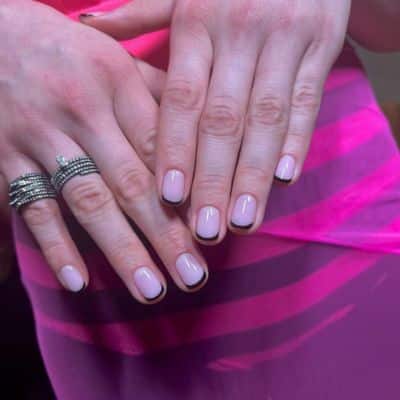
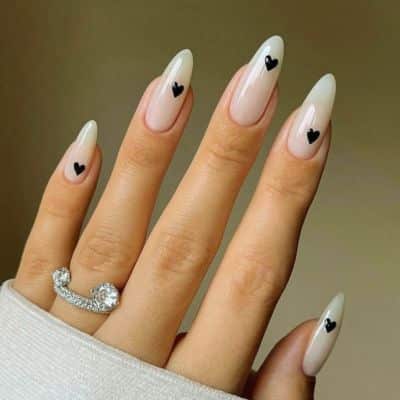
1. Simple Hearts
Materials Needed:
Instructions:
- Start this nude winter nail design by painting your nails with nude nail polish. Apply two coats for full coverage.
- Once your nails are dry, take the black nail polish and use the dotting tool or toothpick to create small hearts on each nail.
- To create a heart shape, start by making two dots close together at the top of the nail, then drag the tool down to create a V shape.
- Fill in the V with black polish to create the heart shapes. Repeat this step on all your nails.
- Allow the black polish to dry completely and apply a clear top coat.
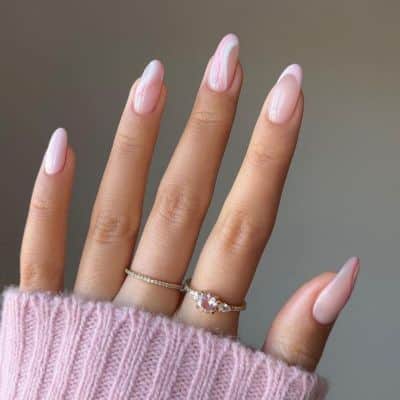
2. Awesome Nails
Materials Needed:
- Nude nail polish
- Baby pink nail polish
- A toothpick or thin nail art brush
- Clear top coat
Instructions:
- Start this winter nude nail design by painting your nails with nude nail polish.
- Once your nails are dry, take the baby pink nail polish and apply a small dot to one side of the nail.
- Using the toothpick or thin nail art brush, drag the pink polish through the nude nail in a swirling motion.
- Repeat this process, adding swirls of pink polish to different areas of each nail for a random and abstract design.
- Allow the polish to dry completely and apply the top coat.
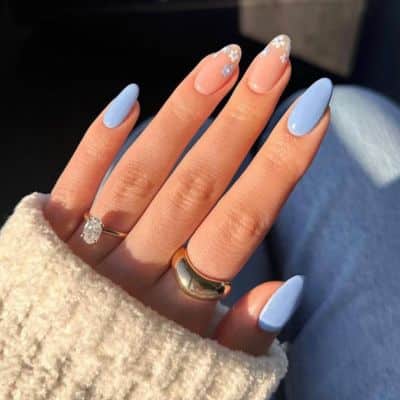
3. Pretty Icy Blue Nails
Materials Needed:
- Icy blue nail polish
- Nude nail polish
- White nail polish
- A toothpick or thin nail art brush
- Clear top coat
Instructions:
- Start this cute winter nail design by painting your nails with the icy blue nail color on three nails.
- Once your nails are dry, paint two nails with nude nail color.
- Using the white and Icy blue nail polish, create three to four small flowers on each of the nude nails.
- Start by making a small dot in the center of the nail, then use the toothpick or thin nail art brush to add five petals around the dot.
- Repeat this process on each nail.
- Allow the polish to dry completely before adding a clear top coat.
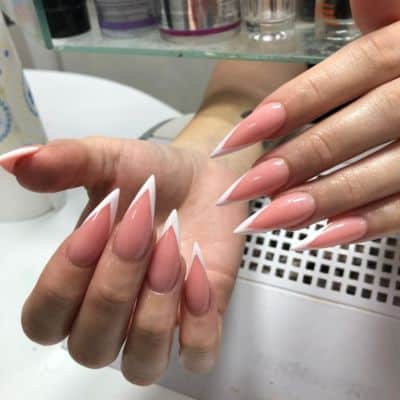
4. Stiletto French Look
Materials Needed:
- Peach nail polish
- White nail polish
- Nail tip guides or scotch tape
- Clear top coat
Instructions:
- Start this winter French tip nail design by filing your nails into a stiletto shape.
- Apply two coats of peach nail polish on each nail.
- Once your nails are dry, apply nail tip guides or scotch tape to the tips of your nails to create a straight edge for the French tips.
- Using white nail polish, paint the tips of your nails in a straight line. Be sure to remove the tape or guides while the polish is still wet.
- To finish this winter stiletto nail design, allow the white polish to dry completely and add a clear top coat.
5. Stars And Moon Nails
Materials Needed:
- Black nail polish
- White nail polish
- A toothpick or thin nail art brush
- Clear top coat
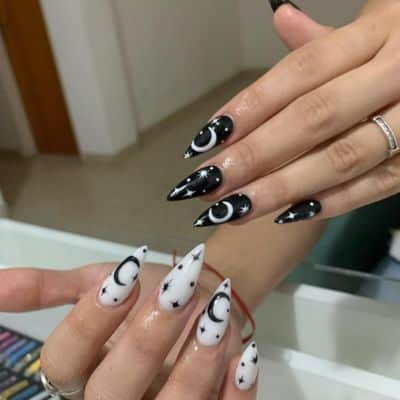
Instructions:
- To try this white winter nail design, file your nails into an almond shape.
- Apply two coats of black nail polish on each nail.
- Once your nails are dry, use the white nail polish to create a moon shape on the base of each nail. Start by making a small circle, then fill it in with white polish to create the moon.
- Using the toothpick or thin nail art brush, create small stars around the moon shape. To create a star, make a small dot and then drag the toothpick or brush down to create five points.
- Repeat steps 3 and 4 on each nail until you have the desired number of stars and moons.
- Apply a clear top coat as the final step of this winter almond nail design.
6. Lavender Deer Love
Materials Needed:
- Lavender nail polish
- Brown nail polish
- White nail polish
- Black nail polish
- A toothpick or thin nail art brush
- Clear top coat
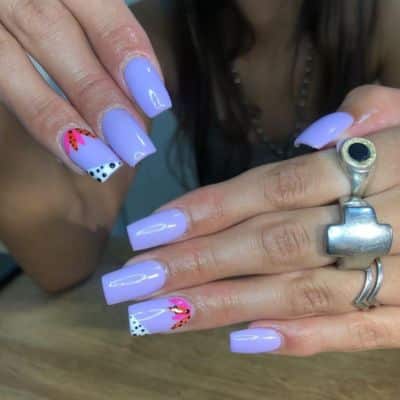
Instructions:
- Start this winter-themed nail design by filing your long nails into a square shape.
- Apply two coats of lavender nail polish on each nail.
- Once your nails are dry, use the brown nail polish to create deer ears on each ring fingernail. Start by making a small triangular shape on the side of the nail, then fill it in with brown polish. Repeat this on the other side to create the second ear.
- Next, create a half-French tip on the same ring fingernails using white nail polish. Apply the white polish to the tip of the nail, using tape or a guide to ensure a straight line.
- Using the toothpick or thin nail art brush, create small black dots on the white part.
- Allow the polish to dry completely before adding a clear top.
7. Glassy Crystal Nails
Materials Needed:
- Beige nail polish
- Clear nail extension kit
- Small colorful crystals or rhinestones
- Nail glue
- A toothpick or thin nail art brush
- Clear top coat
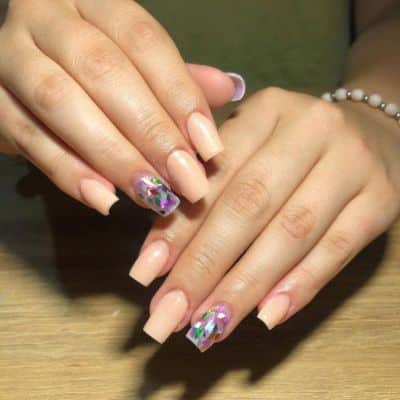
Instructions:
- Start by filing your nails into your desired shape.
- Apply two coats of beige nail polish on each of your four fingers.
- Choose your ring finger and follow the instructions on your clear nail extension kit to apply the extension. Make sure it is fully cured and hardened before moving on to the next step.
- Once your clear nail extension is fully cured, apply nail glue to the surface of the nail.
- While the glue is still wet, use the toothpick or thin nail art brush to apply small colorful crystals or rhinestones onto the nail. Be creative and have fun with it.
- Once the crystals are in place, apply a clear top coat.
8. Glittery Navy Blue Ombre Nails
Materials Needed:
- Base coat
- Glittery navy blue nail polish
- Nude nail polish
- Makeup sponge
- Top coat

Instructions:
- Start this winter blue nail design by preparing your nails.
- Apply a base coat to your nails.
- Paint the nails with glittery navy blue nail polish. Apply two coats for full coverage.
- Take a makeup sponge and apply the nude nail polish onto the sponge.
- Using the sponge, gently dab the nude polish onto the bottom half of your nails, starting from the tip and moving upwards. Do not apply more pressure, as this may remove the glittery silver polish underneath.
- Continue dabbing the sponge until you achieve a perfect ombre effect. Repeat this step a few times to build up the color.
- Allow the polish to dry completely, and apply a top coat.
9. Solid Red Nails
Materials Needed:
- Base coat
- Solid red nail polish
- Top coat
- Nail polish remover
- Cotton swabs
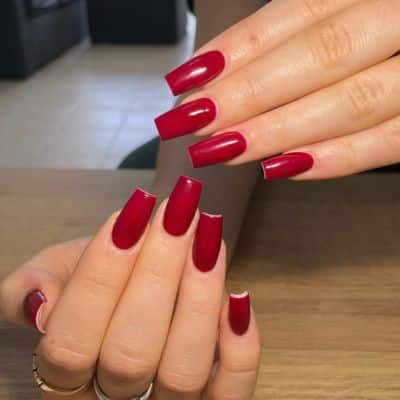
Instructions:
- To try this coffin winter nail design, first prepare your nails.
- Remove old nail polish and trim and file your nails to your coffin shape.
- Apply a base coat to your nails.
- Paint your nails with solid red nail polish, starting from the base of your nails and moving upwards.
- Apply a thin layer of polish.
- Once the first coat is dry, apply a second coat of red polish.
- Apply a top coat to complete this red winter nail design.
10. Lavender Blush Nails
Materials Needed:
- Base coat
- Lavender blush nail polish
- Rhinestones
- Nail glue
- Top coat
Instructions:
- Start by preparing your nails.
- Apply a base coat to your nails.
- Paint your nails with lavender blush nail polish, starting from the base of your nails and moving upwards.
- Once the first coat of polish is dry, apply a second coat of lavender blush polish.
- Once it is dry, select one finger where you want to apply the rhinestone accent.
- Apply a small amount of nail glue onto the nail and place the rhinestone using a pair of tweezers.
- Wait for the glue to dry completely before moving to the next step.
- Apply a top coat to protect the nail polish.
Reference Video
Looking for fun and easy ways to spruce up your nails this winter? Look no further! Check this video that explains some DIY nail design ideas that you can try at home.
With these simple techniques, you will be able to create a variety of unique designs that will make your nails stand out this season.
Importance Of Proper Nail Care During The Winter Months
Proper nail care during the winter months is essential for maintaining healthy, strong, and beautiful nails. Here are some reasons.
- During the winter, the air is dry, and the cold temperatures may strip your nails of moisture.
- In the winter months, it is essential to wash your hands often to prevent the spread of germs, and this frequent hand wash may damage your nails.
- Harsh chemicals in soap and water can also strip your nails of natural oils.
- Heavy winter gloves and socks can be rough on your nails.
By taking proper care of your nails during the winter months, you can maintain healthy and strong nails all year round.
Winter Nail Care Tips
Here are some winter nail care tips to keep your nails healthy and strong.
- Apply moisturizing cream and natural cuticle oil to keep your nails hydrated and healthy.
- Wear gloves during hangouts to protect your nails from getting too dry or brittle.
- Try to use lukewarm water instead of hot water to wash your hands.
- Use a gentle, acetone-free nail polish remover to minimize damage to your nails.
- Try to break nail-biting habits.
- Eat healthy foods rich in iron, biotin, and vitamin E and C.
Rock This Winter With Healthy And Pretty Nails
Extreme nail care during the winter months is essential for maintaining healthy and beautiful hands. From choosing the right nail shape to experimenting with creative designs, there are many ways to shine in the winter. Following these winter nail care tips and trying some of our DIY winter nail design ideas help you become a star in your winter night events.
FAQs
Q: What color nails are best in winter?
A: You can try colors like dark red, burgundy, navy blue, charcoal gray, metallic silver, icy blue, emerald green, plum purple, chocolate brown, and glittery gold in winter.
Q: Are white nails ok for winter?
A: Yes, white nails are one of the suitable choices for the winter. They are associated with spring and summer too.
Q: What Are Cute Winter Colors?
A: Baby pink, light blue, lavender, mint green, blush, peach, lilac, pale yellow, coral, and pastel gray are some cute color choices for the winter season.
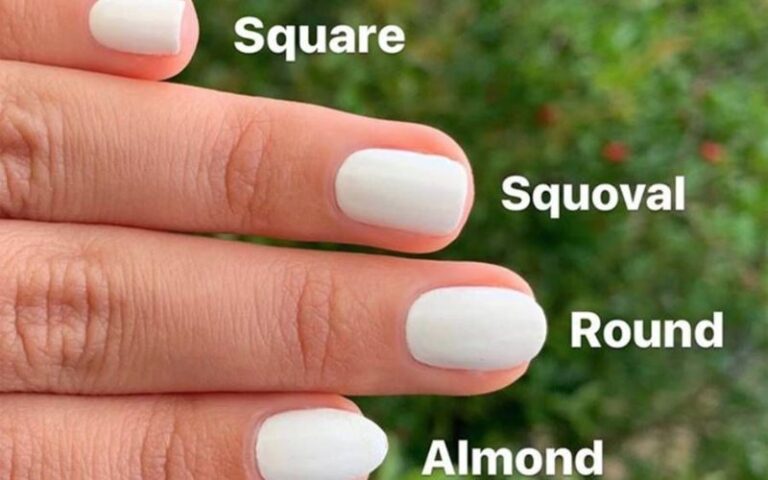
Q: What nail shapes are suitable for winter?
A: Coffin/ballerina, almond, stiletto, square, and oval are perfect for those who love a more natural look in winter. Ultimately, the best nail shape for winter is the one that makes you feel beautiful and confident.
References
- 55 Winter Nail Ideas You’ll Definitely Want To Copy: https://www.glamour.com/gallery/best-winter-nail-ideas
- 12 Steps To Take Perfect Care Of Your Nails In Winter: https://timesofindia.indiatimes.com/life-style/beauty/12-steps-to-take-perfect-care-of-your-nails-in-winter/articleshow/96683978.cms#:~:text=Therefore%2C%20a%20lack%20of%20moisture,splitting%2C%20peeling%2C%20and%20breaking.
- Nail Care Secrets For The Winter Months: https://drbaileyskincare.com/blogs/blog/nail-care-secrets-for-the-winter-months
- 60 Best Winter Nail Ideas And Designs To Try In 2023: https://www.cosmopolitan.com/style-beauty/beauty/g30256908/winter-nail-art/