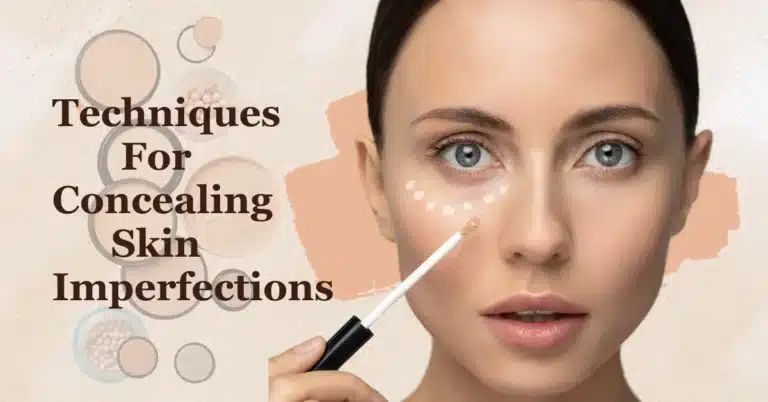
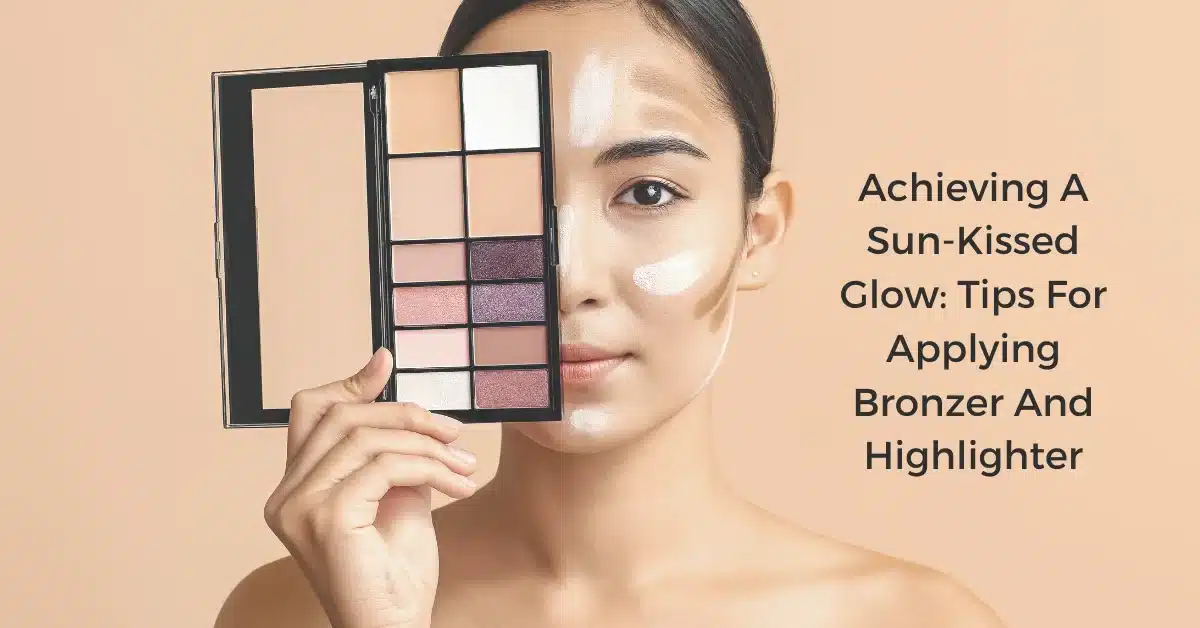
Achieving A Sun-Kissed Glow: Tips For Applying Bronzer And Highlighter
There’s something undeniably magical about the sun’s warm embrace, leaving our skin kissed by its golden rays. While we may not always have the luxury of basking in the sun, we can still capture that luminous radiance with the power of makeup. Bronzer and highlighter are two of the most enchanting tools in the cosmetics world, offering us the means to achieve a sun-kissed glow that looks like we just returned from a tropical getaway.
So, get ready to elevate your glow game with the ultimate bronzing and highlighting techniques. Whether you’re a makeup novice or a beauty aficionado, these tips and tricks will help you achieve a radiant and luminous complexion that will turn heads.
We will unveil the secrets to perfecting your bronzing and highlighting skills. From choosing the right products to applying them flawlessly, we’ve got you covered. Learn how to contour like a pro by sculpting your features and creating a naturally sun-kissed look. Discover the art of highlighting to bring out your best features and create that coveted lit-from-within glow.
Table of Contents
- Understanding What Are Bronzing And Highlighting
- Different Types Of Bronzing Products
- Choosing The Right Bronzing Shade For Your Skin Tone
- Step-By-Step Guide To Applying Bronzer
- Techniques For Highlighting And Accentuating Your Features
- Common Mistakes To Avoid When Bronzing And Highlighting
Understanding What Are Bronzing And Highlighting
Bronzing and highlighting are two fundamental makeup techniques that involve using specific products to enhance the contours of your face and create a radiant, well-defined appearance. Understanding these techniques can help you achieve a polished makeup look.
Bronzing
Bronzing is a makeup technique primarily used to add warmth and depth to the face, mimicking the sun-kissed glow of a tan. It can create the illusion of more defined cheekbones, a slimmer nose, and a sculpted jawline. Here’s how to understand and apply bronzer effectively:
- Choosing the Right Bronzer Shade: Select a bronzer shade that complements your skin tone. For fair skin, opt for a bronzer that is only one or two shades darker than your natural skin tone. For deeper skin tones, choose a bronzer with richer pigmentation.
- Tools: A fluffy or angled makeup brush is ideal for applying bronzer. Ensure that the brush is clean and free of other makeup products.
- Application Areas: Apply bronzer to the areas of your face where the sun naturally hits, such as your cheekbones, the bridge of your nose, your forehead, and along your jawline.
- Technique: Use a light hand and build up the product gradually to avoid an overly dark or muddy appearance. Blend the bronzer well to create a seamless transition between the bronzed areas and your natural skin.
- Blending: Proper blending is crucial to ensure the bronzer appears natural and not streaky. Blend any harsh lines with a clean brush or makeup sponge.
Highlighting
Highlighting is a technique used to accentuate the high points of your face by adding luminosity and a radiant glow. Highlighter products are typically lighter and shinier than your natural skin tone. Here’s how to understand and apply highlighting effectively:
- Choosing the Right Highlighter Shade: Highlighters come in various shades, from icy white to warm champagne tones. The choice of shade depends on your skin tone and personal preference. Lighter shades work well for fair skin, while deeper shades complement darker complexions.
- Tools: A small, tapered makeup brush or a makeup sponge works best for precise highlighting.
- Application Areas: Apply highlighter to the high points of your face, which include the tops of your cheekbones, the bridge of your nose, the cupid’s bow (the area above your upper lip), and the brow bone.
- Technique: Use a light hand to apply the highlighter, as a little goes a long way. Gently sweep or tap the product onto the desired areas.
- Blending: Blend the highlighter seamlessly into your skin to avoid any harsh lines. A well-blended highlighter should create a subtle, luminous effect.
Both bronzing and highlighting are versatile techniques that can be adjusted to suit your makeup style and the occasion. When applied correctly, they can enhance your facial features, create balance, and give your complexion a radiant and sculpted appearance. Mastering these techniques can elevate your makeup game and help you achieve a polished look.
Different Types Of Bronzing Products
Bronzing products come in various forms, each offering a unique way to achieve that sun-kissed glow, including:
- Bronzing Powder
- Bronzing Cream
- Bronzing Gel or Tint
- Bronzing Drops
- Bronzing Mousse or Foam
- Bronzing Spray
- Bronzing Palette or Trio
- Bronzing Sticks
- Bronzing Wipes
- Bronzing Serum
- Temporary Bronzing Tattoos
- Custom Bronzing Drops
When choosing a bronzing product, consider your skin type, desired level of tan, and the application method that suits you best. Whether you opt for bronzing powder, cream, gel, or any other form, these products can help you achieve a sun-kissed glow without the need for sun exposure.
Choosing The Right Bronzer Shade For Your Skin Tone
Choosing the right bronzer shade for your skin tone is essential to achieve a natural, sun-kissed glow. Here are some tips to help you find the perfect bronzer shade for your complexion:
Fair Skin
If you have fair skin, choose a bronzer that is only one or two shades darker than your natural skin tone. Avoid bronzers with orange undertones, as they can appear unnatural on fair skin. Look for shades with cool undertones or neutral shades with a slight taupe or pink undertone. These will provide a subtle and realistic bronzed effect.
Light to Medium Skin
For those with light to medium skin tones, you have more flexibility in choosing a bronzer shade. You can opt for bronzers with warm undertones, such as peachy or golden shades, as they complement your skin tone nicely. Avoid shades that are too dark, as they can appear muddy. A light, golden bronzer will give you a healthy, sun-kissed look.
Medium to Olive Skin
Medium to olive skin tones can pull off a wider range of bronzer shades. You can choose bronzers with warm undertones for a radiant glow or cooler, taupe-based bronzers for a more contoured look. Bronzers with a hint of shimmer can enhance your skin’s natural luminosity.
Tan to Deep Skin
If you have tan to deep skin, opt for bronzers with rich, deep pigmentation. You can go for shades with strong, warm undertones like deep coppers, bronzes, or terracotta tones. Avoid bronzers that are too light, as they may not show up well on your skin. Matte or satin-finish bronzers work best to create a dramatic sun-kissed look.
Consider Your Undertones
In addition to your skin tone, consider your undertones when choosing a bronzer. If you have cool undertones, look for bronzers with cooler undertones, like ashy or taupe shades. For warm undertones, opt for warmer bronzers with golden or peachy undertones.
Test Before You Buy
Always swatch the bronzer on your jawline or wrist before purchasing to ensure it matches your skin tone. Natural light is the best for testing, so try to swatch your bronzer near a window if possible.
Consider The Formula
The formula of the bronzer can also affect how it appears on your skin. Matte bronzers tend to look more natural, while shimmery bronzers can add a luminous effect. Choose the formula that suits your desired look and skin type.
Blend, Blend, Blend
No matter your skin tone, remember to blend your bronzer thoroughly to avoid harsh lines or a patchy appearance. A well-blended bronzer will give you a seamless and sun-kissed finish.
By following these tips and considering your skin tone and undertones, you can confidently choose the right bronzer shade to enhance your complexion and achieve that beautiful, sun-kissed glow.
Step-By-Step Guide To Applying Bronzer
- Start with a clean, moisturized face. Applying bronzer on a smooth canvas ensures a more even application.
- Select a bronzer shade that complements your skin tone. For fair skin, go for a shade that is one or two shades darker than your natural skin tone. For deeper skin tones, choose a richer, warmer shade.
- You’ll need a fluffy or angled makeup brush for bronzer application. Ensure the brush is clean and free from other makeup products.
- Identify the areas of your face that the sun naturally hits. These typically include your cheekbones, the bridge of your nose, forehead, and jawline.
- Gently swirl your makeup brush in the bronzer, tapping off any excess to prevent overapplication.
- Start by applying bronzer to your cheekbones. Sweep the brush from the top of your ear towards the corner of your mouth in a diagonal motion. Use a light hand and build up the product gradually to avoid a heavy appearance.
- Apply bronzer along your hairline on your forehead. This adds warmth and dimension to your face. Blend well to avoid any harsh lines.
- To create the illusion of a slimmer nose, lightly dust bronzer along the sides of your nose. Use a smaller brush or your fingertip for precision.
- Apply bronzer along your jawline to define it. This step can help create the appearance of a more sculpted jaw.
- After applying bronzer to the desired areas, use a clean makeup brush or sponge to blend any harsh lines. Proper blending is essential for a natural look.
- Step back from the mirror and assess your makeup. Make any necessary adjustments to ensure your bronzer appears seamless and enhances your features without looking too heavy or streaky.
- You can finish with a setting spray to lock in your makeup and achieve a longer-lasting bronzed look.
Techniques For Highlighting And Accentuating Your Features
Highlighting and accentuating your features with makeup can help you achieve a radiant and sculpted look. Use these techniques to highlight and accentuate specific areas of your face:
1. Cheekbones
- Apply a highlighter product (cream, powder, or liquid) to the tops of your cheekbones. Use a makeup brush or your fingertip for precise application.
- Blend the highlighter gently in an upward motion towards your temples to create a lifted effect.
- To further define your cheekbones, you can also apply a matte bronzer or contour shade in the hollows of your cheeks, just below the cheekbone, and blend it upward.
2. Brow Bone
- Sweep a small amount of highlighter beneath your eyebrows on your brow bone. This can make your eyes appear more lifted and awake.
- Thoroughly blend the highlighter to ensure there are no noticeable or harsh lines.
3. Inner Corners of Eyes
- Applying a tiny amount of highlighter to the inner corners of your eyes can brighten and open up your eyes.
- Use a small brush or your fingertip for precision.
4. Bridge of the Nose
- To slim and define your nose, apply a thin line of highlighter down the center of your nose’s bridge.
- Be subtle with this application to avoid making your nose look too wide.
5. Cupid’s Bow
- Highlighting your cupid’s bow (the area above your upper lip) can make your lips appear fuller.
- Apply a small dab of highlighter to this area and blend it gently.
6. Chin
- A touch of highlighter on your chin can give your face a lifted and radiant look.
- Use a light hand and blend it in for a subtle effect.
7. Collarbone and Shoulders (Body Highlighting)
- You can highlight your collarbone and shoulders for a glamorous touch when wearing off-the-shoulder or sleeveless outfits.
- Apply highlighter to these areas and blend for a luminous, sculpted appearance.
8. Center of Forehead
- Highlighting the center of your forehead can add dimension to your face.
- Use a small amount of highlighter and blend it in for a natural look.
9. Upper Cheek Area (Soft Blush)
- To achieve a flushed and youthful appearance, apply a soft blush shade to the apples of your cheeks. This can complement your highlighted cheekbones.
- Blend the blush well for a seamless transition between the highlighter and blush.
10. Under Eye Area (Concealing and Brightening)
- To brighten the under eye area and conceal dark circles, use a concealer that is one or two shades lighter than your skin tone.
- Blend the concealer in a triangular shape, extending from the inner corners of your eyes to the sides of your nose and out towards your temples.
Remember to choose highlighter shades that complement your skin tone, and always blend thoroughly to avoid harsh lines. The goal is to elevate natural beauty and create a radiant, sculpted look that accentuates your best features.
Common Mistakes To Avoid When Bronzing And Highlighting
Bronzing and highlighting are essential makeup techniques that can enhance your features and give you a radiant, sculpted look. However, there are some common mistakes to avoid to ensure your makeup looks flawless. Here are the top mistakes to steer clear of when bronzing and highlighting:
1. Choosing the Wrong Shades
Bronzer: Selecting a bronzer shade that is too dark for your skin tone can result in an unnatural, muddy appearance. Conversely, choosing one that’s too light may not provide the desired warmth and definition.
Highlighter: Using a highlighter that is too stark or ashy for your skin tone can create an unflattering, ghostly effect. Opt for highlighter shades that complement your complexion.
2. Overapplication
Bronzer: Applying too much bronzer can lead to an overly bronzed and heavy look. Start with a light hand and build up the product gradually to avoid this mistake.
Highlighter: Using excessive highlighter can result in a blinding, metallic appearance. Highlighter should provide a subtle glow, not an overwhelming shine.
3. Incorrect Placement
Bronzer: Misplacing bronzer can make your face appear asymmetrical or uneven. Ensure you apply bronzer to the areas where the sun naturally hits, like your cheekbones, forehead, and jawline.
Highlighter: Applying highlighter to the wrong areas can accentuate imperfections or create an unbalanced look. Stick to highlighting the high points of your face, such as the cheekbones, brow bone, and cupid’s bow.
4. Lack of Blending
Bronzer: Failing to blend your bronzer thoroughly can result in harsh lines and a patchy appearance. Blend well to ensure a seamless transition between the bronzed areas and your natural skin.
Highlighter: Skipping the blending step with a highlighter can leave harsh streaks or a disjointed appearance. Always blend highlighter to create a soft, luminous effect.
5. Ignoring Skin Texture
Applying highlighter to areas with prominent texture, like acne scars or fine lines, can draw attention to these imperfections. Be mindful of where you apply highlighter and opt for a more subtle application on textured areas.
6. Using Shimmer Everywhere
Bronzer: Using a shimmery bronzer all over your face can make you look overly glittery or oily – reserve shimmery bronzers for targeted areas, like the tops of your cheekbones.
Highlighter: Applying an overly shimmery highlighter can accentuate skin imperfections or emphasize oily areas. Use a matte highlighter or a subtle shimmer on areas with texture or shine concerns.
7. Neglecting Skin Preparation
Skipping skincare steps like moisturizing and priming can affect how bronzer and highlighter adhere to your skin. Start with a well-moisturized and prepped canvas for smoother application.
8. Not Adjusting for Different Lighting
Makeup may appear differently in various lighting conditions. Consider how your makeup looks in natural daylight, indoor lighting, and evening settings to ensure it’s flattering in all situations.
9. Relying on Trends Alone
Following makeup trends without considering your individual features and style can lead to makeup looks that don’t suit you. Adapt techniques to enhance your unique beauty.
By avoiding these common mistakes, you can achieve a beautifully bronzed and highlighted look that enhances your features and radiates natural beauty. Remember that practice and experimentation are key to mastering these makeup techniques.
There you have it, folks!
Achieving a sun-kissed glow with bronzer and highlighter is all about finding the right products, mastering the techniques, and letting your inner radiance shine through. Whether you prefer a bronze liquid highlighter or a classic powder combo, the key is to have fun with it. So go ahead, glow like the star you are, and dazzle the world with your newfound radiance!
FAQs
Q: Can I use bronzer as a contour?
A: Absolutely! Bronzer is great for adding warmth and dimension to your face, doubling up as a contour product.
Q: What’s the difference between bronzer and highlighter?
A: Bronzer adds warmth and depth, while highlighter imparts a radiant, shimmering effect.
Q: Can I use a highlighter without foundation?
A: Yes, you can! Highlighter can be applied to bare skin for a natural glow.
Q: Which skin tones suit bronze liquid highlighter best?
A: Bronze liquid highlighter looks stunning on medium to deep skin tones.
Q: What’s the best brush for applying bronzer?
A: A fluffy, angled brush is ideal for bronzer application, ensuring a soft, blended finish.
Q: How can I make my highlighter pop?
A: Apply a cream or liquid highlighter underneath your powder highlighter for an intense, radiant look.
References
https://www.wetnwildbeauty.com/how-to-apply-blush-bronzer-highlighter-concealer/
https://www.moodysisters.com/blog/2022/3/10/how-to-use-bronzer-and-highlighter